|
|
Post by Wizard on Aug 5, 2011 20:11:52 GMT -5
I just tried out your beta, GREAT mod! Simplest, easy to get into, easy to understand, and just downright fun  |
|
|
|
Post by Wizard on Aug 4, 2011 0:24:31 GMT -5
nice wizard, please explain how you did it. what did you change? There is a zombie_grapples_disabled in debug menu too for those of you who use that feature. Very very simple, really. I noticed in the Missions.txt that when I was searching for ""srv_denyce"" (Like you told me to do so I could find the very first zombrex mission of the game) A little ways under that I saw this line InvulnerableToGrapples = "false" So I changed it to InvulnerableToGrapples = "true" And I tested it ,and she couldn't be grappled, the zombies try to grapple her but she just does like a little "Nudge" animation instead and takes a very small amount of damage. |
|
|
|
Post by Wizard on Aug 4, 2011 0:09:39 GMT -5
Tonight I took the time to learn how to make any item in the game giftable to katie. Thankfully after trial and error, it was a complete success! Another thing worth mentioning is it isn't that difficult. What we are going to need to edit is 2 files, Missions.txt and Items.txt Open them both up in any TXT editing software. For this tutorial I am going to show you how to make the FireAxe, Giftable to Katie, and how to control how much PP it gives. So the first thing we are going to need to do is to make the FireAxe Giftable to Katie at all, to do this, Search for this in In Items.txt cPlayerWeaponItem FireAxe Anywhere in the entry for FireAxe, at the end of a line, hit Enter (To make a new line) and type in Giftable = "true" It should look like this:
cPlayerWeaponItem FireAxe
{
AchievementCategory = "0"
Giftable = "true"
ActionButton0 = "PLAYERBUTTON_QUICKRELEASE"
ActionButton1 = "PLAYERBUTTON_QUICK_ATTACK"
ActionButton2 = "PLAYERBUTTON_CHARGEATTACK_SHORT"
ActionDesiredAnimState0 = "ANIMSTATE_ATTACKSEQUENCE"
ActionDesiredAnimState1 = "ANIMSTATE_ATTACKSEQUENCE"
ActionDesiredAnimState2 = "ANIMSTATE_ATTACKSEQUENCE"
ActionRequiredAnimState1 = "ANIMSTATE_ATTACKSEQUENCE"
ActionTargetCrawlerOnly6 = "false"
AnimationAttackChooserValue0 = "198"
AnimationAttackChooserValue1 = "161"
AnimationAttackChooserValue2 = "373"
AnimationAttackName0 = "male_2hand_heavy_7_to_4_a"
AnimationAttackName1 = "male_2hand_2_to_7_b"
AnimationAttackName11 = "male_throw_1hand_object"
AnimationAttackName2 = "male_2hand_1_to_5_ground"
AnimationChooserValueForHand = "8"
AnimationChooserValueForIdle = "0"
AnimationChooserValueForPickup = "0"
AnimationChooserValueForPutdown = "0"
AnimationChooserValueForThrow = "10"
AnimationChooserValueForWalkRun = "0"
AnimBankName = "2hand_bank1"
AssetFilename = "data/models/weapons/fire_axe"
AssociatedMagazineType0 = "8"
AttackAudioAssetName0 = "FireAxeHitBody"
AttackAudioAssetName1 = "FireAxeHitBody"
AttackAudioAssetName2 = "FireAxeHitBodyBig"
AttackDamage0 = "75"
AttackDamage1 = "75"
AttackDamage2 = "100"
AudioActionBits = "256"
AudioFilename = "fx_fireaxe"
AudioItemName = "FireAxe"
CollidableQuality = "0"
CollisionAudioDissipationFactor = "0.01"
CollisionBits = "WORLDCOLLISIONFILTER_DYNAMIC_PROP"
CollisionType = "3"
ComboBlendDuration0 = "0.1"
ComboBlendDuration1 = "0.15"
ComboBlendDuration2 = "0.1"
ComboBlendXZToUse0 = "2"
ComboBlendXZToUse1 = "2"
ComboBlendXZToUse2 = "2"
ComboBlendYToUse0 = "2"
ComboBlendYToUse1 = "2"
ComboBlendYToUse2 = "2"
DisplayName = "50078"
DR2 = "true"
Durability = "35"
EffectAudio0 = "5"
EffectAudio1 = "5"
EffectAudio2 = "5"
EffectOnImpact0 = "280"
EffectOnImpact1 = "280"
EffectOnImpact2 = "280"
EffectOnVictim0 = "21"
EffectOnVictim1 = "21"
EffectOnVictim2 = "20"
FatalHitReaction0 = "HITREACTION_WEAPON_SLICE_HORIZONTAL"
FatalHitReaction1 = "HITREACTION_WEAPON_SLICE_HORIZONTAL"
FatalHitReaction2 = "HITREACTION_FATAL_GROUP2"
Friction = "25"
HandlingStyle = "0"
HandsForPickup = "1"
HitReaction0 = "HITREACTION_WEAPON_SLICE_HORIZONTAL"
HitReaction1 = "HITREACTION_WEAPON_SLICE_HORIZONTAL"
HitReaction2 = "HITREACTION_WEAPON_HEAVY_MEDIUM"
IconFilename = "w_fireaxe"
ImpactIsSynchronized2 = "false"
Impulse0 = "1"
Impulse1 = "1"
Impulse2 = "1"
InteractDistance = "1.3"
InventoryInteractionType = "0"
Is_Cliche = "true"
Is_Sharp = "true"
IsWeapon = "true"
Is_Humour = "true"
LoadDistance = "25"
LocatorOrientationOffset = "0.000,0.000,0.000,1.000"
LocatorPositionOffset = "0.0,0.0,0.0"
MaxProjectileDamage = "75"
ProjectileFatalHitReaction = "51"
ProjectileHitImpulse = "1"
ProjectileHitReaction = "13"
PropEffectLocator0 = "30"
PropEffectsOnCondition0 = "1"
PyroEffect0 = "38"
RequiredComboSeqCounter0 = "0"
RequiredComboSeqCounter1 = "1"
RequiredComboSeqCounter2 = "0"
ResetComboSeqCounter1 = "true"
ResetComboSeqCounter2 = "true"
ResetComboSeqCounter3 = "false"
Restitution = "0.01"
RestrictedByRegion = "false"
Reticle_ActiveInRangeMode = "true"
Reticle_Type = "1"
SurvivorWeapon = "true"
ThrowAngleDegrees = "5"
ThrowEffectAudio = "2"
ThrowEffectOnImpact = "280"
ThrowEffectOnVictim = "9"
ThrowForce = "10"
ThrowSpin = "17.5,0,0"
VibrationPattern0 = "5"
VibrationPattern1 = "5"
VibrationPattern2 = "10"
WeaponCanSliceLimbs = "false"
WeaponType = "3"
Weight = "15"
cAttachedToZombieInfoItem faxe_attached_info
{
DamagePerSecondWhenAttachedToZombie = "60"
PositionToStickTo = "2"
StickableArea = "0"
StickableAsProjectile = "true"
StickArbitrarily = "true"
}
cLimbDestroyInfoItem FireAxe_gore
{
Limb0 = "0"
Limb1 = "1"
Limb2 = "2"
Limb3 = "3"
Limb4 = "4"
mFlags0 = "4"
mFlags1 = "2052"
mFlags2 = "2052"
mFlags3 = "2055"
mFlags4 = "2055"
ProbabilityOfExploding0 = "1"
ProbabilityOfExploding1 = "1"
ProbabilityOfExploding2 = "1"
ProbabilityOfExploding3 = "1"
ProbabilityOfExploding4 = "1"
}
}
Save Items.txt, and you can close it out now if you want. Now, we go to Missions.txt Search & find this: cMissionObjectiveGiveItemToNPC GiveGiantStuffedBear It should bring you to something that looks exactly like this:
cMissionObjectiveGiveItemToNPC GiveGiantStuffedBear
{
ITEM_NAME = "GiantStuffedBear"
NPCName = "cast_katey"
cMissionCinematic x152
{
CinematicName = "katie_recieve_gift_large"
NoTeleportAfterIsOK = "true"
cMissionSetNPCScriptedAction x153
{
IsLooping = "true"
NPCName = "cast_katey"
Orientation = "103.175"
ScriptedActionName = "KatieExcited"
SetOrientation = "false"
UseOrientation = "true"
}
cMissionDialogue x154
{
Dialogue0 = "65073"
Speaker0 = "cast_katey"
SpeakerID0 = "50051"
}
cMissionSetChuckState GivePP_Bear1
{
ChuckState = "10"
Value = "15000"
}
cMissionSetChuckState drop_item2
{
ChuckState = "18"
}
cMissionSetChuckState FatherOfTheMonth2
{
ChuckState = "12"
Value = "1339"
}
}
}
Now take this entire entry in Missions.txt, copy it, and Paste it under the entry we just copied (MAKE IT SURE IT'S SPACED CORRECTLY) Now, there is only a few things we have to edit First, change cMissionObjectiveGiveItemToNPC GiveGiantStuffedBear TO cMissionObjectiveGiveItemToNPC GiveFireAxe 2ndly, change ITEM_NAME = "GiantStuffedBear" TO ITEM_NAME = "FireAxe" 3rd, To give this giftable item it's own ID for the amount of PP given,and to make it so the item can only be gifted once we need to change cMissionCinematic x152 TO cMissionCinematic x700 (For each new item, just keep going up from 700 1 by 1, like 701, 702...etc) Lastly, we need to change (THIS STEP IS OPTIONAL, though I still recommend you do it to leave no room for error) cMissionSetChuckState GivePP_Bear1 TO cMissionSetChuckState GivePP_FireAxe1 Under that, you'll see Value = "15000" This value amount determines how much PP you're given once you give Katie the item. Once you've edited everything, it should look like this:
cMissionObjectiveGiveItemToNPC GiveFireAxe
{
ITEM_NAME = "FireAxe"
NPCName = "cast_katey"
cMissionCinematic x700
{
CinematicName = "katie_recieve_gift_large"
NoTeleportAfterIsOK = "true"
cMissionSetNPCScriptedAction x153
{
IsLooping = "true"
NPCName = "cast_katey"
Orientation = "103.175"
ScriptedActionName = "KatieExcited"
SetOrientation = "false"
UseOrientation = "true"
}
cMissionDialogue x154
{
Dialogue0 = "65073"
Speaker0 = "cast_katey"
SpeakerID0 = "50051"
}
cMissionSetChuckState GivePP_FireAxe1
{
ChuckState = "10"
Value = "20000"
}
cMissionSetChuckState drop_item2
{
ChuckState = "18"
}
cMissionSetChuckState FatherOfTheMonth2
{
ChuckState = "12"
Value = "1339"
}
}
}
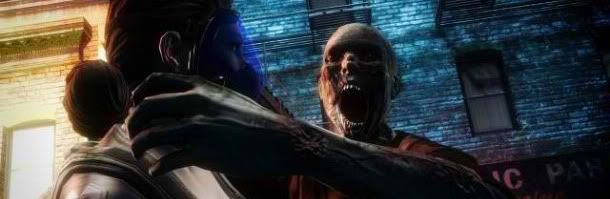
Sorry if the tutorial is a bit jumpy on details. Screenshot Example:  |
|
|
|
Post by Wizard on Aug 3, 2011 22:23:50 GMT -5
Hey great project idea!
I do have 1 suggestion, about the mod name.
Why not name it something like
Dead Rising 2: Case [Project Name Here]
Just an idea...sounds more official IMO then 2.5
|
|
|
|
Post by Wizard on Aug 3, 2011 22:19:01 GMT -5
This is just a simple mod I did after I was looking into the missions.txt to see what it controlled and what it did. What this mod does is make it so Survivors can no longer get Grappled, meaning you don't have to worry about them making you back track and saving there annoying butts every 30 seconds. They do still take damage from other things of course, if they didn't it'd make it way to easy. The whole point was to make it less annoying but still have fear that they can die. No screenshots obviously, there is no real way I could do that  Download: www.fileserve.com/file/SWFFPtdTo install simply replace your Datafile.big with this one, found in your Data folder of your Dead Rising 2 Install. For more advanced users, you can also just take this Datafile.big, extract it, take the missions.txt, put it into your already modded Datafile, repack it, and your good to go. Enjoy! -Wizard |
|
|
|
Post by Wizard on Jul 29, 2011 16:31:35 GMT -5
If you can pull this off, I'd give you a big hug |
|
|
|
Post by Wizard on Jul 28, 2011 23:00:51 GMT -5
Good neat idea. Good work |
|
|
|
Post by Wizard on Jul 28, 2011 22:25:51 GMT -5
Great Tutorial Easy to understand & follow. |
|
|
|
Post by Wizard on Jul 28, 2011 22:02:15 GMT -5
Great work!  |
|
|
|
Post by Wizard on Jul 28, 2011 20:58:16 GMT -5
Simply Brilliant |
|
|
|
Post by Wizard on Jul 15, 2011 8:02:17 GMT -5
Thanks for all the help guys =] greatly appreicated
|
|
|
|
Post by Wizard on Jul 13, 2011 18:31:38 GMT -5
So this is an idea I came up with yesterday while brainstorming ideas for modding Dead Rising 2, I want something I have a passion for (Resident Evil) So I will stay interested in the project.
Here is what my goal is...
I want a mix of Re4, and the original RE games.
LIST OF THINGS TO DO/LEARN:
1.Make the camera so it's 100% of the time over the shoulder, just like Re4/Re5.
2. Make the environment's darker. Pretty dark.. not pitch dark. I also want the Flash Light to be a major part of seeing around good.
3. Learn how to Lock doors, and to play keys around the stages that you need to find to open the doors. (<-- MAJOR)
4. Remove the Mission timers altogether.
5. Along with the camera tweak, I want to make the game much, much more oriented towards Guns, instead of Melee weapons.
6. Is it possible to make Reloading possible on guns? Any way to make find-able ammo for guns?
7. Greatly limit inventory space, down to max of 5 slots so players have to make smart choices on what they carry (just like old REgames)
There may be more things Im just not thinking of at the moment.
If ANYBODY can help me with ANYTHING listed above, that'd be really great.
Also, Please note, this is mostly a Brainstorm idea. If there is to many problems, or to few things can be done, then it won't feel like Re enough so I wouldn't want to dump aton of time into it.
Let's see if we can make this happen!!
|
|
|
|
Post by Wizard on Jul 13, 2011 13:02:30 GMT -5
Reuploaded |
|
|
|
Post by Wizard on Jul 12, 2011 22:55:25 GMT -5
***UPDATE!!** Tutorial has been updated with a custom Xlive.dll, rather then a cracked game launcher. Enjoy!! -Wizard ============================= Today I learned a really nifty trick. By using a Hex Editor, you can very easily change the Path, or simply the extension of the file the game will load, so it won't replace the original game files, by simply having 2 different EXE's you choose to boot the game up with. There is however, 1 downside. If you have a legit copy of Dr2, via DVD, Steam..or any other official copy of the game, when you edit those EXE's, it instantly breaks the GFWL features of the game (I assume the did this for DRM and Online Protection) What this means is, for you to be able to save, you'll need to use this custom XLive.dll so you can save without the need of GFWL at all, this also means these exe's can only be used for Offline play. =================================== WHAT YOU NEED: 1. Hex Editor, Get HxD (Really nice hex editor, and simple) mh-nexus.de/en/downloads.php?product=HxD2. Custom Xlive.DLL (To allow saves offline GFWL) www.ziddu.com/download/15669120/xlive.zip.html==================================== HOW TO DO IT: 1. Go to your root directory of Dead rising 2, where this is, depends on where and how you installed the game. (Like by DVD, Steam...etc) Once you find Deadrising2.exe, copy ,and paste it. Rename it to Deadrising2mods.exe 2. Open up HxD, and open Deadrising2mods.exe in it. 3. With the EXE opened in the Hex Editor, hit CTRL+F on your keyboard to open the Search box. Within this text box, type in Npcs.big, then click OK. Leave everything else in that popup window alone. It will bring you to a section of the file that looks like this: ...data/models/npcs.big.... On the Text Side (Right side) Change it to ...data/models/npcs.mod.... Now, it'll look, and fully load Npcs.big as Npcs.mod, and ONLY when you use this launcher. But now we need to go make a Npcs.Mod So go to Data/models/ And copy, paste Npcs.big, after paste is done, rename the new file to Npcs.Mod All done! Enjoy ;D This method I posted above should work on any .BIG file listed within the Deadrising2.exe |
|
|
|
Post by Wizard on Jul 11, 2011 8:23:30 GMT -5
Very nice! Keep it up!
|
|
|
|
Post by Wizard on Jul 7, 2011 14:55:19 GMT -5
Wow, badass idea dude!
I wish you the best of luck on this project! =D
|
|
|
|
Post by Wizard on Jun 15, 2011 17:34:58 GMT -5
Awesome mod man. I like how you payed close attention to detail on where you placed the items. Great stuff |
|
|
|
Post by Wizard on Jun 12, 2011 11:38:44 GMT -5
Cool tool dude, keep up the great work I know Programming is no easy task, but its all in practice =D |
|
|
|
Post by Wizard on Jun 11, 2011 17:22:47 GMT -5
I really do hope you can get this working. I would make good use of this |
|
|
|
Post by Wizard on Jun 3, 2011 7:07:23 GMT -5
Wow guys congratz on actually getting it to the release state That is pretty wicked. |
|
|
|
Post by Wizard on May 25, 2011 21:45:02 GMT -5
Cool idea.
And zombieland is awesome =P
|
|
|
|
Post by Wizard on May 25, 2011 20:13:20 GMT -5
Okay, recompiling the previously non working files inside npcs.big works, so there is no sort of compression outside-file related. Can someone try swapping chest_young_chuck with chest_default in DR2 from my file link? that will give us some indication. I'm about too. Though I can bet money it'll just crash due to texture compression problems. I'm about too. Though I can bet money it'll just crash due to texture compression problems. Complete game crash upon loading. No surprise =P |
|
|
|
Post by Wizard on May 15, 2011 9:52:55 GMT -5
Okay, ubiq. was able to find all of the collision files for the environment (walls floors, immovable furniture) . I suggest we post a mod challenge to find be able to move the collision locations. If we learn this, we can create new areas What is "ubiq" dude? I've seen you say that alot but I have no idea what it means lol Plus the mod challenge may be a good idea |
|
|
|
Post by Wizard on May 15, 2011 9:17:52 GMT -5
I tested it. I can confirm everything that Moloko posted above me is all accurate. I experienced the same exact things.
|
|
|
|
Post by Wizard on May 15, 2011 8:35:08 GMT -5
A beta? Sweet!
I'll look into it, but frankly I'm not sure entirely what to expect, I mean, I've never played the original dead rising's infinity mode.
|
|
|
|
Post by Wizard on May 15, 2011 8:15:29 GMT -5
Great to see you have been keeping the back updates up to date, you will be very happy you've done this at some point =P
|
|
|
|
Post by Wizard on May 15, 2011 7:50:50 GMT -5
As pointed out by anno, all other text files appear fine but only the datafile's text is strangely coded. Yet the environment is not encoded; so theoretically it could still work. I've seen alot of files outside of the datafile.big that were all messed up. I'm really starting to think that alot of these files have a special encyption on them (Alot of xbox360 files/games do this) For example, I know a guy who was able to extract PS3 and PC Resident evil 5 Arc's, but he could never manage to do xbox360's due to it's special encryption made it to hard to deal with. We may have very well ran into the same issue here. I'm sorry to say this but unless we can find some super-duper awesome tool maker there is no way we will be able to do a full convert of the files over. The main thing we need is the environment.. we can add the zombies, surv, and items ourselves. |
|
|
|
Post by Wizard on May 14, 2011 23:08:11 GMT -5
Great stuff. I'll look into this.
|
|
|
|
Post by Wizard on Apr 30, 2011 7:04:39 GMT -5
Hold on sport. There is a MUCH easier way of doing this. As a rule of thumb, always search the Google search bar first. Usually saves you some time. I thought the point was to get away from Texmod? Anyways since Chrrox doesn't seem to be answering me about the Script at this point, I guess I'd better spice up the tutorial on how to do it manually by Header, and the different texture types. |
|
|
|
Post by Wizard on Apr 25, 2011 6:31:25 GMT -5
I remember I swapped an entire _NM files in the safehouse to another stages, and it had no effect on the safehouse..
|
|