billsy
Survivor
 Keep living your life, with Zombrex
Posts: 66
|
Post by billsy on Feb 17, 2015 7:49:49 GMT -5
I think I found the key while digging for the clothes files, which reminds me that I'll need to post another update to my mod soon, har har. I wonder if there's a way i can place the key as a world object... Did you ever get to the bottom of this and get access to the police impound? I've recently just got Dead Rising 3 on PC and decided to have a look at what has been going off on the forums and came across this thread and decided to have a look for myself. I took a different route though in trying to get into the impound to no avail and was wondering if someone could shed some light on the situation. So what I did was unpacked the san_paulino_south_almuda.big file and decided to search for the door and change its' door locked state to unlocked. Now with how they named objects with the numbers, which is different to how they did it in Dead Rising 2, it's quite confusing trying to find a specific item in the code that is placed in the world. Anyway, I changed all the doors located in that file to unlocked, which didn't work, so I then tried deleting all of the doors, and that had no effect whatsoever. Could some point me in the right direction? Am I looking in the wrong file, will this even work? It did on Dead Rising 2, so I see no reason as to why it wouldn't here. Thanks. |
|
billsy
Survivor
Keep living your life, with Zombrex
Posts: 66
|
Post by billsy on Jul 25, 2013 22:54:18 GMT -5
Hey billsy, are these things stackable? Like can i have 20 mailbombs in one slot? If so, that would be AWESOME SAUCE! Not sure, it's classed as an explosive (obviously) as oppose to a projectile, you could try changing it to a projectile and add in a line of code such as the following; numberOfThrowables = and then the amount you want. If you did this, I'm not sure how, if at all, the physics of the item would change given the alteration to the item category. But hey, if you don't try, you don't know, but that would be my first inquiry regarding the matter. So I'd advise to change "cExplosiveItem PlayerPostmanMailbomb" to "cProjectileLauncherItem PlayerPostmanMailbomb" and then add "NumberOfThrowables = "x"" with x being the number of throwables you want. Try it and get back to me, if not, I'll have a rethink. Have fun now! |
|
billsy
Survivor
Keep living your life, with Zombrex
Posts: 66
|
Post by billsy on Jul 25, 2013 22:38:14 GMT -5
Isn't there a line something like "numberOfThrowables = 20"? If I recall correctly, that's the line of code you should be looking to use.
|
|
billsy
Survivor
Keep living your life, with Zombrex
Posts: 66
|
Post by billsy on Jul 22, 2013 12:33:14 GMT -5
If you replaced the workbench code with co-ordinates for a dumbbell (which I assume would have been placed on the floor) then the interact button to use the workbench (providing the code is correct, which from what I can gather looking back, it is) then it's going to be placed on the floor, meaning you character might not be able to interact with it. Try having a play with the co-ordinates, make sure it's not situated too close to a wall that's in the wall and try increasing the altitude to it's in the air and away from the floor. If you find it and it works, try and create a combo weapon to see if that works. Once you get it working we can then look at a more precise placing within the TIOD room.
As for the ketchup and it being a spray item, if I remember correctly their durability is measured at a percentage? Not sure how you'd go about making it so that didn't decrease and it's always at a fixed value i.e 100% I'm a bit busy at the moment to have a decent look in-game. However, if we can't sort this here and the workbench doesn't work, I'll download the game again and have a look for myself, create the workbench and send you the code if need be.
Goodluck and have fun!
|
|
billsy
Survivor
Keep living your life, with Zombrex
Posts: 66
|
Post by billsy on Jul 22, 2013 1:41:35 GMT -5
Hmm, the workbench does not seem to appear, i put it to where the dumbell is, and deleting one of them, thier coordinates are almost the same exactly. What am i doing wrong? And how would i make ketchup have unlimited durability? Like instead of 100, how can i get it to 99999? I put the durability to 99999 and unlimiteddurability= true but no effect, although i already had ketchup in my inventory, and it was blinking red at 84, like it was going to expire. Any help on that? And you are really a big help to my modding questions, like a sensei lol. And yeah i thought it was going to be alot of coding too when it was going to the part when i reveal the workbench code haha. Thanks alot, -Stay Spoodified, ~Uncle Spoods Hey, sorry, I'm not sure with regards to ketchup, I'd have to check what type the item is classed as. Hmm, when you placed the code for the workbench, was there a button to interact with? If so, did you try using two items on it in order to create a combo weapon? I'll have a check back later on to see your response and specifically what you did and then I'll have more of an extensive look into it for you. There might be more code that I forgot to post, as I say, I'll have a look into for you later on after I've had a break. |
|
billsy
Survivor
Keep living your life, with Zombrex
Posts: 66
|
Post by billsy on Jul 21, 2013 21:39:09 GMT -5
Ok, your game will corrupt if you edit your missions.txt file and proceed to load a previous save game. With that in mind, you're best of searching and installing all of the mods you want and then proceed to play the game to your hearts content. Can you clarify which of my mods you are trying to install? I get you want to get into the TIOD room, but then you quoted instructions I gave to get one of the casino vault rooms into the game (which isn't in Sandbox at all, and is only accessible at given points with the storymode). If you just want to get into the TIOD room, installing this will not affect your savegame as it doesn't edit the missions.txt file. Do you know how to unpack and repack your datafile.big? If not, I suggest looking at tutorials found on the forum and once you know how to do this, proceed to follow the instructions I have provided within this thread (see below): A picture of the vent door you use to get into the TIOD room can be seen here: www.mediafire.com/imageview.php?quickkey=pp7c4hmn40ycjy2 Should you not wish to look into this, simply download the datafile.big: Download Link: www.mediafire.com/file/j7df1yiei01dop1/datafile.bigThis will install of the mods contained within this thread (maybe not the latter ones), I can't remember as it's been a while, if this is the case and you install this and something is missing, please tell me and I can update the file. Alternatively, I could just sent you a different datafile.big with the only modification being access to the TIOD room. Regarding your query as to how to access the TIOD room, the room is located in Kokonutz Sports Town in Palisades Mall. I placed a ventilation door to the right of the locked door allowing you to access the area. In order to leave, simply use the door as you would as it's unlocked from the inside. Moving on to your other point, item placement, co-ordination and orientation is something you need to learn and practice. If you're looking at getting into placing items on the map, there's no doubt some tutorials on this site. If you're using and modding OTR, I find the best method to place new items is to use Debug Mode for Dead Rising 2 (if you have it) as that comes with on-screen numerical co-ordinates and rotation values which can then be used in conjunction with OTR as the Debug Mode for OTR doesn't have the co-ordinates functionality. I hope this has helped. If not, again feel free to ask away and I shall check back again in order to clarify further. Have fun and good luck modding. This did actually help me a bit, and no i do not own dead rising 2. I appreciate you typing all of this to help me out, and i will find tuts on placing items. I guess i did not use this code to the room, i used the other one that requires to edit missions.txt, im not sure if this is your first time posting this more simple code, but yes i will give it a try. And now that i know where it is, it will make things easier, and will installing your datafile.big affect my modified items or saferoom item placements? If so, then i cannot take the datafile you put in your response. And on the triggervolume part on the code, do i post that at the top of the document as the first one? Anyways thanks alot and i appreciate you helping me. -Stay Spoodified ~Uncle Spoods, aka, well you know.  Glad I could help. Yes, installing my datafile.big will affect your items and saferoom item placements, you could download my datafile.big and then add the code from your datafile.big and merge the two files, but I wouldn't advice that if you don't create suitable backups and if you have a lot of code as it might become confusing. With regards to putting code into text files, as long as the code uses correct syntax (i.e it is coded proper and the code works) it doesn't matter where in the text file the code is placed, so long as it works and is in the correct text file. And what text document do i look for to modify the item placements in tiod room? Like put items in or replace them? That'll be tape_die.txt located within your datafile.big file Wow, sorry if i am spamming, but i got the tiod room mod to work! Great mod and thanks alot! But is there a code to place a crafting table in there? But theres these pool cues that are in the way, but i will remove that so not an issue, anyways thanks man! -Stay Spoodified ~Uncle Spoods Great! Glad you got it working and you're using my mods. Regarding crafting tables, the tables themselves aren't individual objects and are just models that make up environments, they're just meshes. The way crafting tables work is via the interact icon and there's a bit of coding related to that. If you check this video below, it demonstrates that you can create and place your own crafting table wherever you say wish, providing you create code for it. What I recommend doing if you want a crafting table in the TIOD room is to download my datafile.big and look in food_barn,txt. I myself have just had a quick look to remind myself how I did it and I think have the answer which is a lot simpler than what I thought it would have been. What you want to do is use this code and just change the location to somewhere in the TIOD room and just alter the rotation through trial and error: cItemPlacement Workbench1
{
ItemName = "Workbench"
Location = "57.778,-1.373,-263.302"
PropState = "3"
Rotation = "0.000,0.152,0.000,0.988"
}
I could have sworn there was more code than that to get your own workbench up and running, but evidently not. If you try this, let me know if you get it working as I'm interested now, haha. Glad I could help, good luck and feel free to message back with any further queries. |
|
billsy
Survivor
Keep living your life, with Zombrex
Posts: 66
|
Post by billsy on Jul 19, 2013 11:05:46 GMT -5
Oh this thread! Okay, well actually i am pretty new to modding, and i just do not know how to place items at the right places due to the complications of the coordinate numbers, like i do not understand how they work, and yes i do want to go in the tiod room, and i tried your method but it corrupted my save, which barely had any progress on it so it wasnt much of an issue, and im not sure where to find it anyways, im pretty sure its by the door but i cannot find it. Anyways if we could skype or something, and you could walk me through this process i would really appreciate it! Thanks alot for your response and take care. ~Uncle Spoods, aka Professor Spoods And sorry, i was not too specific, i did try to do the Sandbox only method and posted that code in the area you told me to, but when i start new game, it does not show up, is it because i started a new game? You said editing the missions.txt will corrupt the save and require a new game. Is it because im making a new game? If so, how can i play my saved game with the teleport to the room? And how do i know where items are going to be when editing the position coordinates without copying an item placement text and pasting? Thanks. ~Uncle Spoods, aka Professor Spoods Ok, your game will corrupt if you edit your missions.txt file and proceed to load a previous save game. With that in mind, you're best of searching and installing all of the mods you want and then proceed to play the game to your hearts content. Can you clarify which of my mods you are trying to install? I get you want to get into the TIOD room, but then you quoted instructions I gave to get one of the casino vault rooms into the game (which isn't in Sandbox at all, and is only accessible at given points with the storymode). If you just want to get into the TIOD room, installing this will not affect your savegame as it doesn't edit the missions.txt file. Do you know how to unpack and repack your datafile.big? If not, I suggest looking at tutorials found on the forum and once you know how to do this, proceed to follow the instructions I have provided within this thread (see below): Ok, I had this finished and promised prior to leaving for a while to play some different games, but I'm back now, and here it is. This opens up the TIOD room for use with both Story Mode and Sandbox Mode. In Palisades.txt, paste this at the top of the document:
cDoorPlacement door_vent
{
	InitialState = "-2"
	IsStatic = ""
	ItemName = "door_vent"
	Location = "230.200,0.400,-87.100"
	NonInteractableProp = "true"
	Rotation = "0.000,-0.985,0.000,-0.410"
}
In Waypoint_Palisdes.txt copy and paste this:
cTriggerVolume TIODTeleport
{
	ActionType = "3"
	Cooperative = "true"
	DisplayName = "80044"
	Height = "2.0"
	InteractButton = "true"
	InteractionRadius = "1.5"
	Level = "TAPE_DIE"
	LevelSpawnPoint = "Start"
        Location = "230.500,0.800,-87.400"
	Radius = "3"
	Rotation = "0,0,0,1"
	Vertex1 = "-1,0,1"
	Vertex2 = "1,0,1"
	Vertex3 = "1,0,-1"
	Vertex4 = "-1,0,-1"
}
To the right of the TIOD room should be a vent which can be used in order to access the room. In order to exit, simply use the door as it's unlocked from the inside. A picture of the vent door you use to get into the TIOD room can be seen here: www.mediafire.com/imageview.php?quickkey=pp7c4hmn40ycjy2 Should you not wish to look into this, simply download the datafile.big: Download Link: www.mediafire.com/file/j7df1yiei01dop1/datafile.bigThis will install of the mods contained within this thread (maybe not the latter ones), I can't remember as it's been a while, if this is the case and you install this and something is missing, please tell me and I can update the file. Alternatively, I could just sent you a different datafile.big with the only modification being access to the TIOD room. Regarding your query as to how to access the TIOD room, the room is located in Kokonutz Sports Town in Palisades Mall. I placed a ventilation door to the right of the locked door allowing you to access the area. In order to leave, simply use the door as you would as it's unlocked from the inside. Moving on to your other point, item placement, co-ordination and orientation is something you need to learn and practice. If you're looking at getting into placing items on the map, there's no doubt some tutorials on this site. If you're using and modding OTR, I find the best method to place new items is to use Debug Mode for Dead Rising 2 (if you have it) as that comes with on-screen numerical co-ordinates and rotation values which can then be used in conjunction with OTR as the Debug Mode for OTR doesn't have the co-ordinates functionality. I hope this has helped. If not, again feel free to ask away and I shall check back again in order to clarify further. Have fun and good luck modding. |
|
billsy
Survivor
Keep living your life, with Zombrex
Posts: 66
|
Post by billsy on Jul 18, 2013 22:50:21 GMT -5
|
|
billsy
Survivor
Keep living your life, with Zombrex
Posts: 66
|
Post by billsy on Jul 18, 2013 22:49:09 GMT -5
Hi unclespoods, I just decided to check how things are going here as I haven't played Dead Rising in a while. Can you be more specific as to what mods you want installing and what you need help with? If you want everything, what I advise doing is downloading the datafile.big from my original post on the first page of this thread. I saw your thread about wanting to access The Tape It Or Die room, I looked at this thread and what I've posted in the past and I have posted code to gain access to that area. If you're new to modding, which I get the feeling you are, the easier thing to do is back up your original datafile.big and do a simple replacing of files as oppose to editing the file yourself if you're unsure as to what you are doing. If you can be more specific as to what you want, I'll be sure to check back to see your reply and to lend a hand in anyway I can. If you choose to download my datafile.big, if you encounter any problems with download links etc, please let me know.
Cheers,
Billsy
|
|
billsy
Survivor
Keep living your life, with Zombrex
Posts: 66
|
Post by billsy on Jul 21, 2012 12:31:13 GMT -5
How can i put the Protoman Suit to the other side cuz i have the free dlc mod Do you mean you want to place the Protoman Suit dispenser to the other side of the bathroom? If this is the case, change the location of the Protoman Suit dispenser within Safehouse.txt contained within datafile.big to this: Location = "5.000,-1.067,19.400" Screenshot of new position: 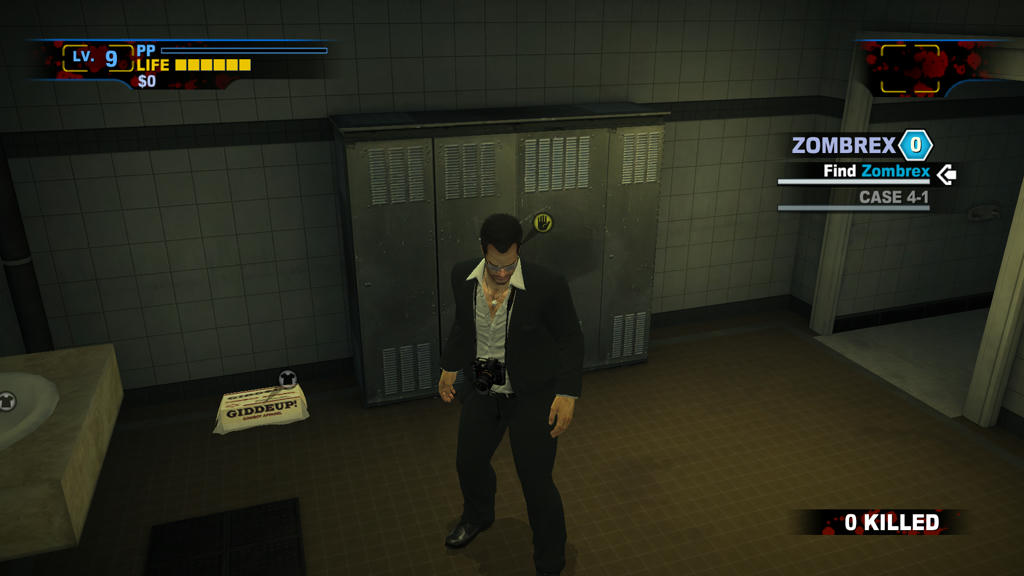 I hope this helps you. |
|
billsy
Survivor
Keep living your life, with Zombrex
Posts: 66
|
Post by billsy on Jul 21, 2012 11:38:22 GMT -5
How can i put the Protoman Suit to the other side cuz i have the free dlc mod Do you mean you want to place the Protoman Suit dispenser to the other side of the bathroom? |
|
billsy
Survivor
Keep living your life, with Zombrex
Posts: 66
|
Post by billsy on Jul 21, 2012 9:28:24 GMT -5
at first thank you^^ though im afraid it doesnt work or i just dont get it to work... im not quiete sure bout that^^. i renamed the files in the protester.big/fullbody.big file in the "battle" folder file and put them into the default.big/fullbody.big file. nothing changed so far. did you mean something else i should do? i replaced the "boss_protester" in the name of every file with "cat" like in the default.big/fullbody.big folder. is that what you ment? im pretty sure your idea was quiete different right?^^ edit: oh and i am using dead rising 2 not OTR but i dont think that makes any difference does it? Ok you're on the right lines, but you need to rename the protestor files you're copying across to the same name as the animation for Frank, e.g rename the protestor idle to run animation as "frank_idle_combat_to_run" repeating the same process for all of Frank's movement animations. This should hopefully work. Also you need to do the same for the root.big. Extract the movement animations of the root.big found within protestor.big and copy and rename the animations found in there into the root.big within default.big, remembering to rename the files so that they replace the movement animations for Frank. Apoligies if this doesn't work, i've not tested it personally, but in theory it should work. As a safety measure, make your you've backed up the original files. |
|
billsy
Survivor
Keep living your life, with Zombrex
Posts: 66
|
Post by billsy on Jul 21, 2012 9:17:22 GMT -5
I cant Pack Npcs folder to a .big file becuase the Gibbedtool crashes can you help? Try and copy the folder to your desktop instead of trying to pack a folder that has been edited in the directory where the game files are saved. If that doesn't work, try right-clicking Gibbed Tools Pack.exe and run it in compatibility mode and/or run the program as Administrator. That should hopefully work and resolve the issue you're having. |
|
billsy
Survivor
Keep living your life, with Zombrex
Posts: 66
|
Post by billsy on Jul 20, 2012 13:31:25 GMT -5
Only thing left would be the movement animations. Does anyone know about that? I have a suggestion, although i'm not sure if it'll work as I haven't tried it, but it's worth a shot. You could try and go to Program Files/Capcom/Dead Rising 2 Off The Record/Data/Anim/Battle and unpack the protestor.big. This file contains all of the animations for Brandon Whittaker. You could then unpack default.big which is located here; Program Files/Capcom/Dead Rising 2 Off The Record/Data/Anim. Once you've done that, you could try copying and pasting some/all of Brandon's animations, such as idle and movement animations into the default.big and making sure you rename the file to correspond to the default Frank animation. Once that's done, simply repack the defualt.big and load up Dead Rising. Remember to backup your original default.big! I'm not sure if the attack animations would work, but you can give it a shot. If you decide to try this, do post back with the results. |
|
billsy
Survivor
Keep living your life, with Zombrex
Posts: 66
|
Post by billsy on Jul 17, 2012 15:17:13 GMT -5
transfer the .txt file over to OTR then. Doesn't work, given that the bike tutorial doesn't exist in OTR, even if you copy it across, it either has no effect or crashes your game. |
|
billsy
Survivor
Keep living your life, with Zombrex
Posts: 66
|
Post by billsy on Jul 17, 2012 15:14:54 GMT -5
Can I play the single player single player campaign with this model? If i can, the other clothes will fit him? Or it just replace the final boss? Thanks! Yes you can use this in Single Player and yes you can swap clothes. |
|
billsy
Survivor
Keep living your life, with Zombrex
Posts: 66
|
Post by billsy on Jul 17, 2012 15:11:00 GMT -5
Dead Rising 2's infinity mode mod starts in that area. Look at its coding to see how it sets it up. I have done, I did that a few days ago, it's the same as the getting access to it in Story Mode, through the use of Level_Biketutorial.txt which doesn't exist in OTR. I'm still not sure as to whether or not it actually exists as an entity in OTR, but surely you could copy the required stuff from DR2 and it'd work in OTR? The only problem being i've tried everything, i'm at a loose end, hence the post. There's a outline of what looks to be the bikeshop which is visible when you're under the map within the arena in OTR, but it's just a black placeholder. |
|
billsy
Survivor
Keep living your life, with Zombrex
Posts: 66
|
Post by billsy on Jul 17, 2012 14:15:11 GMT -5
Ok, so I’m trying to make the bikeshop environment (opening cinematic from the Dead Rising 2 game prior to starting the bike tutorial)spawn in Dead Rising: Off The Record. Currently the game refuses to spawn the environment despite my best efforts.
Dead Rising: Off The Record seems to hold all of the files that make up the bikeshop (i.e the geometry files etc)it just seems to be a case of telling the game to actually spawn it.
In OTR, the files for the bikeshop are located in three places:
Within arena_backstage_z10.big, which can be found in Data/Models/Environment/Arena_Backstage
Within both TIR_bike_shop.big and TIR_bike_shop_02.big which can both be found in Data/Models/Environment/Arena_Stadium
Now, when you compare this to Dead Rising 2, the two files, TIR_bike_shop.big and TIR_bike_shop_02.big are EXACTLY the same across both games as I’ve checked their contents and they are the same in size in each game. However, although the bikeshop does indeed load in DR2 (Infinity mode spawn point for proof)only two files have contents relating to the bikeshop and those files are both TIR_bike_shop.big and TIR_bike_shop_02.big
That means that the contents to spawn the environment are located within these two .big files which ARE present in OTR.
However, in Dead Rising 2, the arena (where the tutorial takes place, not arena_backstage which is part of the map)is part of a file called gs_biketutorial.txt and so if you wanted to gain access, you have to refer to this file. Whereas in OTR, the arena is integrated within arena_backstage.txt which makes sense as the bike tutorial doesn’t exist in OTR as the tutorial is different (wrestling) and the gs_biketutorial.txt doesn’t exist.
There is a file called arena_stadium.txt which might be involved somehow although when I try and teleport to this area, my game just crashes.
In OTR, arena_backstage_z10.big, the bike files seem to be different compared to both TIR_bike_shop.big and TIR_bike_shop_02.big. I was thinking that if you copy the geometry files from both of these and place them in arena_backstage_z10.big and repack, there’ s a chance the environment might spawn. I would do this myself, however, I’m useless when it comes to .tex files and making sure everything is there and that the game can refer to all of the files present without the game crashing.
I have tried everything I can possibly think of up until this point and so am asking for assistance. It’s not a big deal but I’ve put a fair amount of time into this and hopefully(if indeed it is possible)want to see it through. Hopefully if someone has some spare time and doesn’t have a current project might help in lending a hand with this.
Note - If you don't know what the bike shop environment looks like, watch the intro of Infinity Mode on Youtube, it's that. If required I can use DR2 in order to post a screenshot.
|
|
billsy
Survivor
Keep living your life, with Zombrex
Posts: 66
|
Post by billsy on Jul 17, 2012 12:22:54 GMT -5
Managed to access the arena and the elevator seen in the bike tutorial level from Dead Rising 2. For a quick video preview, watch this so you know where all of the waypoints are: Open Arena_Backstage.txt and paste the following:
cSpawnPoint StadiumEntrance
{
	CameraHeading = "-88.562"
	CameraPitch = "-8.474"
	Location0 = "90.000,-2.281,3.700"
	Rotation0 = "-1.674"
}

cSpawnPoint StadiumElevator
{
	CameraHeading = "-180.000"
	CameraPitch = "-8.474"
	Location0 = "75.000,-7.281,-38.500"
	Rotation0 = "3.348"
}

cSpawnPoint StadiumEntrance1
{
	CameraHeading = "88.562"
	CameraPitch = "-8.474"
	Location0 = "60.000,-2.281,3.700"
	Rotation0 = "1.674"
}
Find:
cDoorPlacement Arena_Halldoor1andcDoorPlacement Arena_Halldoor2and replace the code present withcDoorPlacement Arena_Halldoor1
{
AudioEnvVolume = "Corridor5_Door1"
InitialState = "0"
ItemName = "door_pushbarL"
Location = "-63.4822,13.6484,11.0752"
NonInteractableProp = "true"
Rotation = "0,-0.7071,0,0.7071"
SiblingDoorName = "Arena_Halldoor2"
}
cDoorPlacement Arena_Halldoor2
{
AudioEnvVolume = "Corridor5_Door1"
InitialState = "0"
ItemName = "door_pushbarR"
Location = "-63.4822,13.6484,13.8752"
NonInteractableProp = "true"
Rotation = "0,0.7071,0,0.7071"
SiblingDoorName = "Arena_Halldoor1"
}
Once you've done that, open Waypoint_Arena_Backstage.txt and place the following within the .txt filecTriggerVolume StadiumExit
{
ActionType = "3"
DisplayName = "835"
Height = "2.0"
InteractButton = "true"
InteractionRadius = "3"
Level = "LEVEL_ARENA_BACKSTAGE"
LevelSpawnPoint = "Start"
Location = "98.000,-1.000,3.500"
Radius = "3"
Rotation = "0,0,0,1"
Vertex1 = "-1,0,1"
Vertex2 = "1,0,1"
Vertex3 = "1,0,-1"
Vertex4 = "-1,0,-1"
}
cTriggerVolume StadiumEntrance
{
ActionType = "3"
DisplayName = "835"
Height = "2.0"
InteractButton = "true"
InteractionRadius = "3"
Level = "LEVEL_ARENA_BACKSTAGE"
LevelSpawnPoint = "StadiumEntrance"
Location = "-63.500,14.730,12.330"
Radius = "3"
Rotation = "0,0,0,1"
Vertex1 = "-1,0,1"
Vertex2 = "1,0,1"
Vertex3 = "1,0,-1"
Vertex4 = "-1,0,-1"
}
cTriggerVolume StadiumElevator
{
ActionType = "3"
DisplayName = "835"
Height = "2.0"
InteractButton = "true"
InteractionRadius = "3"
Level = "LEVEL_ARENA_BACKSTAGE"
LevelSpawnPoint = "StadiumElevator"
Location = "52.000,-1.000,3.500"
Radius = "3"
Rotation = "0,0,0,1"
Vertex1 = "-1,0,1"
Vertex2 = "1,0,1"
Vertex3 = "1,0,-1"
Vertex4 = "-1,0,-1"
}
cTriggerVolume StadiumReturn
{
ActionType = "3"
DisplayName = "835"
Height = "2.0"
InteractButton = "true"
InteractionRadius = "3"
Level = "LEVEL_ARENA_BACKSTAGE"
LevelSpawnPoint = "StadiumEntrance1"
Location = "81.500,-5.281,-42.400"
Radius = "3"
Rotation = "0,0,0,1"
Vertex1 = "-1,0,1"
Vertex2 = "1,0,1"
Vertex3 = "1,0,-1"
Vertex4 = "-1,0,-1"
}
Finally, open missions.txt and locate
cMissionDefinition Sandbox_Special cMissionLevelReady ArenaBackstage2Stadium
{
LevelName = "LEVEL_ARENA_BACKSTAGE"
cMissionSendCommandToProp DestroyStadiumDoor1
{
PropCommand = "17"
PropName = "door1"
}
cMissionSendCommandToProp DestroyStadiumDoor2
{
PropCommand = "17"
PropName = "door2"
}
cMissionSendCommandToProp DestroyStadiumDoor3
{
PropCommand = "17"
PropName = "door3"
}
cMissionSendCommandToProp DestroyStadiumDoor4
{
PropCommand = "17"
PropName = "door4"
}
cMissionSendCommandToProp DestroyStadiumFence
{
PropCommand = "17"
PropName = "fence_main"
}
cMissionSendCommandToProp DestroyStadiumFence1
{
PropCommand = "17"
PropName = "fence_main1"
}
cMissionSendCommandToProp DestroyStadiumFence2
{
PropCommand = "17"
PropName = "fence_main2"
}
cMissionSendCommandToProp DestroyStadiumFence3
{
PropCommand = "17"
PropName = "fence_main3"
}
cMissionSendCommandToProp DestroyStadiumFenceCorner
{
PropCommand = "17"
PropName = "fence_corner"
}
cMissionSendCommandToProp DestroyStadiumPillar
{
PropCommand = "17"
PropName = "fence_pillar"
}
cMissionSendCommandToProp DestroyStadiumFloor
{
PropCommand = "17"
PropName = "floor"
}
cMissionSpawnItem FloorStadium
{
IsStatic = "true"
ItemName = "ArenaFloor"
Location = "75,-4.63334,3.57161"
NonInteractableProp = "true"
Rotation = "0,0,0,1"
}
cMissionSpawnItem BaseballBat
{
FixedOnInitialPlacement = "true"
ItemName = "BaseballBat"
LinearVelocity = "0.0,0.0,0.0"
Location = "79.433,1.167,7.879"
Rotation = "0.667,-0.102,0.202,0.710"
}
cMissionSpawnItem TwoByFour
{
FixedOnInitialPlacement = "true"
ItemName = "TwoByFour"
LinearVelocity = "0.0,0.0,0.0"
Location = "70.704,1.190,-0.785"
Rotation = "0.002,-0.200,-0.003,0.980"
}
} Please note, that when accessing the arena through the two sets of double doors within the backstage area of the arena up the stairs, the double doors situated to the left are used to navigate to the arena whereas the double doors to the right remain unchanged as they are story-related and need to be used in Overtime Mode as far as i'm aware. Also note, this can only be used with Sandbox Mode and the arena will not spawn if you attempt to access it in Story Mode. I can't be bothered to pour through mission.txt in order to find the flags to restore as most people that use this will be using it for Sandbox purposes anyway. Finally, please be aware that this mod requires you to edit your missions.txt which will result if you having to start a freash Story Campaign as well as a new Sandbox game. Be warned, if you install this and wish to un-do any changes you may have made, remember to backup your entire datafile.big or alternatively your missions.txt prior to making any changes. Enjoy. |
|
billsy
Survivor
Keep living your life, with Zombrex
Posts: 66
|
Post by billsy on Jul 17, 2012 12:01:03 GMT -5
Ok, I had this finished and promised prior to leaving for a while to play some different games, but I'm back now, and here it is. This opens up the TIOD room for use with both Story Mode and Sandbox Mode. In Palisades.txt, paste this at the top of the document:
cDoorPlacement door_vent
{
	InitialState = "-2"
	IsStatic = ""
	ItemName = "door_vent"
	Location = "230.200,0.400,-87.100"
	NonInteractableProp = "true"
	Rotation = "0.000,-0.985,0.000,-0.410"
}
In Waypoint_Palisdes.txt copy and paste this:
cTriggerVolume TIODTeleport
{
	ActionType = "3"
	Cooperative = "true"
	DisplayName = "80044"
	Height = "2.0"
	InteractButton = "true"
	InteractionRadius = "1.5"
	Level = "TAPE_DIE"
	LevelSpawnPoint = "Start"
        Location = "230.500,0.800,-87.400"
	Radius = "3"
	Rotation = "0,0,0,1"
	Vertex1 = "-1,0,1"
	Vertex2 = "1,0,1"
	Vertex3 = "1,0,-1"
	Vertex4 = "-1,0,-1"
}
To the right of the TIOD room should be a vent which can be used in order to access the room. In order to exit, simply use the door as it's unlocked from the inside. |
|
billsy
Survivor
Keep living your life, with Zombrex
Posts: 66
|
Post by billsy on Jul 11, 2012 11:14:15 GMT -5
I'd love to fight like 5 psychopaths at the same time. Cuztoms, I did start something like this prior to leaving for abit. But i'm back now and after a few little things that I need to finish, I might go back to it. Do you mean something like this? deadrising2mods.proboards.com/index.cgi?board=dr2otcwip&action=display&thread=1184If so, it won't take much work in order to finish that and get the first iteration of it released and then I can improve on it from there. |
|
billsy
Survivor
Keep living your life, with Zombrex
Posts: 66
|
Post by billsy on Feb 7, 2012 10:18:10 GMT -5
Thanks. Your other mod makes it REALLY handy to get back to the safehouse from the Arena. Any chance on making another warp from the Yucatan strip back to the safehouse as well? Which mod are you on about? Sorry I haven't had time to have a play with Dead Rising as of late, as i've been busy. Tell me the mod in question and specifically what you want and i'll get something sorted for you. And thanks, glad you find some of the mods useful. |
|
billsy
Survivor
Keep living your life, with Zombrex
Posts: 66
|
Post by billsy on Jan 30, 2012 14:37:41 GMT -5
I would rather just leave it. I don't really want to start the game from scratch again. You'd only have to start a new game if you edited your missions.txt file, if you delete the door from the rooftop_yucatan.txt file, you wouldn't have to restart your game. Sorry if my previous post implied that, you could just try that if having access to that area is important. There's nothing much up there anyway as oppose to downstairs, just a lot of food. |
|
billsy
Survivor
Keep living your life, with Zombrex
Posts: 66
|
Post by billsy on Jan 30, 2012 13:01:28 GMT -5
Hmm, you could just delete that same code from the text file altogether so there won't be a door to open and that way you can definitely access the roof, or you could probably find where the game tells the door to open and loop the action, that to should open the door. If you want to do that, you'd have to look in missions.txt and that'll require you to start a new game.
|
|
billsy
Survivor
Keep living your life, with Zombrex
Posts: 66
|
Post by billsy on Jan 30, 2012 10:30:53 GMT -5
But when you get to the doors where you would go to get onto the rooftop and the button appeares to open it.It won't open.I already know this is because it is bound to the facts mission.So I was gonna say is there anyway way to get the doors to open in the normal DR2? You're going to have to go into "rooftop_yucatan.txt" and find this: cDoorPlacement RoofDoor1
{
AudioEnvVolume = "Hallway_Exterior_Blend"
ItemName = "door_standardknob"
Location = "143.1408,35.0702,-207.0505"
Rotation = "0,0.924,0,-0.3823"
SiblingDoorName = "RoofDoor2"
}Once you've found that enter this line: InitialState = "1" Repack your datafile.big and try the door, pretty sure that'll work. |
|
billsy
Survivor
Keep living your life, with Zombrex
Posts: 66
|
Post by billsy on Jan 28, 2012 14:00:31 GMT -5
Frank can only escort 8 survivors at once, Otis will not call about a scoop if Frank has the maximum amount of survivors or if the number of survivors in the active scoops plus the number of current survivors in your party equal more than 8. This includes unannounced scoops and scoops which Frank never answered. If Frank has the potential to rescue a survivor, that survivor is counted toward the eight survivor rule. The eight survivor rule only applies with regards to a scoop and when you're recruiting a survivor to escort, the survivors in Sandbox Mode fall into neither category so you can spawn as many as you want, hence how I've managed to spawn about 30 now, and they all exist at the same time. But thanks for pointing out a potential obstacle, just glad the rule doesn't apply here. |
|
billsy
Survivor
Keep living your life, with Zombrex
Posts: 66
|
Post by billsy on Jan 27, 2012 7:49:22 GMT -5
Having some trouble getting survivors from Story Mode that don't appear in Sandbox Mode to behave correctly. Getting them to spawn and editing their props etc is easy. However, they seem to have an extremely fast run when there's a bit of distance between themselves and the player, like survivors do in story so they can catch up to the player. Is there anyway of getting around this so they just move normally? I have a feeling it's to do with this line, for example: Target_state = "2"Here's an image of a new survivor in Sandbox Mode, any help on the above problem would be appreciated, tried a few things, but none have seemed to work. 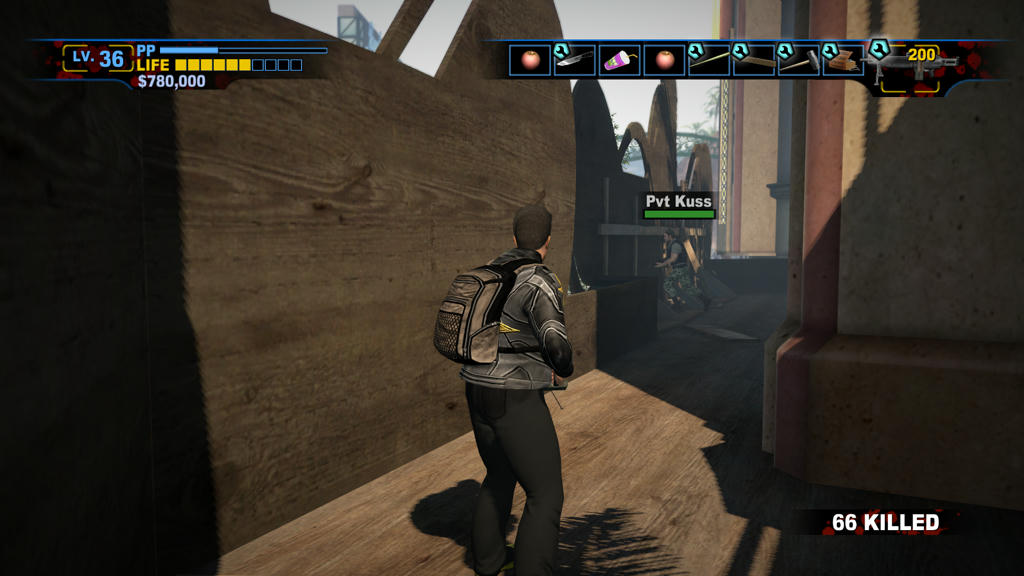 Update: Not sure if this is just an isolated case given the survivor I chose. Tried several more and they are fine, still wouldn't mind finding out the answer. |
|
billsy
Survivor
Keep living your life, with Zombrex
Posts: 66
|
Post by billsy on Jan 26, 2012 18:44:29 GMT -5
Quick update to end today: 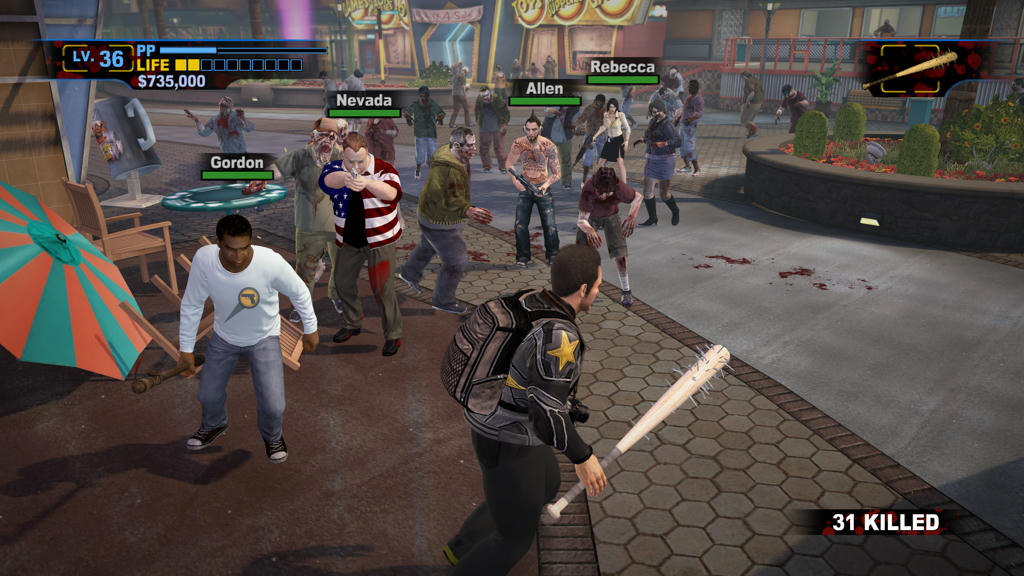  As displayed in the screenshots above, all 25 of the survivors included in Sandbox Mode (roughly 4 or 5 survivors per area) spawning from the beginning of a new Sandbox Mode has been achieved Tomorrow I'll try to implement the spawning of bosses to coincide with the spawning of survivors from the beginning of the game, will update tomorrow. P.S, I don't know if people have played enough Sandbox Mode to fight Rebecca when she spawns on Day 3, but watch out for her! Especially when this mod get's released and you have to fight her alongside 3 or 4 other survivors, jeez. When testing this I got owned first time around. |
|
billsy
Survivor
Keep living your life, with Zombrex
Posts: 66
|
Post by billsy on Jan 26, 2012 12:22:10 GMT -5
After Freako released his backpack mod, I made the bag have a purpose by giving the player unlimited ammo for the Handgun, Shotgun, Sniper Rifle, Six Shooter, LMG and Merc Assault Rifle, M16, and for the Tactical M16 and SubGun (which only applies if you have them installed, if not, don't copy the code as it's irrelevent) when the backpack is equiped. The bag serves a similar purpose to the Solider Outfit, in the sense that it increases the ammo limit, however, you only have to wear one piece of clothing as oppose to an entire outfit. If you don't want unlimited ammo, but want some form of increase in the ammo, delete the "UnlimitedDurability = "true"" line for the gun(s) in question and modify the ammo multiplier. I made something along the lines for GTA IV and thought it'd be useful in Dead Rising. After asking Freako for permission, he agreed to allow me to release this. All credit for the implementation of the backpack itself goes to Freako. Obviously you're going to need to download the backpack and install it, so first and foremost, do that. Here's a link to the thread: deadrising2mods.proboards.com/index.cgi?board=dr2otcmodelreleases&action=display&thread=1175Once you've done that, open items.txt and copy the code below: cFirearmItem EnhancedSixShooter1
{
AchievementCategory = "2"
ActionButton0 = "PLAYERBUTTON_WEAPON_ATTACK_RESERVED_FOR_SURVIVOR"
ActionDesiredAnimState0 = "ANIMSTATE_SIDLEAIMGUN"
ActionTargetCrawlerOnly6 = "false"
AimIKLeftAngleLimit = "30"
AimIKRightAngleLimit = "30"
AnimationAttackName0 = "male_6shooter_idle_to_1fan_to_idle"
AnimationAttackName1 = "male_6shooter_1fan_loop"
AnimationAttackName2 = "male_6shooter_idle_to_1fan_to_idle"
AnimationAttackName3 = "male_attack_flamethrower_light"
AnimationChooserValueForFirearms = "5"
AnimationChooserValueForHand = "23"
AnimationChooserValueForIdle = "0"
AnimationChooserValueForPickup = "0"
AnimationChooserValueForPutdown = "0"
AnimationChooserValueForWalkRun = "0"
AnimBankName = "6shooter"
AssetFilename = "data/models/weapons/handgun6shooter"
AttachPropToBoneType = "0"
AudioActionBits = "264"
AudioFilename = "fx_sixshooter"
AudioItemName = "SixShooter"
BaseBulletDamage = "150"
CollidableQuality = "0"
CollisionAudioDissipationFactor = "0.01"
CollisionType = "3"
ComboBlendDuration0 = "0"
ComboBlendDuration1 = "0"
ComboBlendXZToUse0 = "2"
ComboBlendXZToUse1 = "2"
ComboBlendYToUse0 = "2"
ComboBlendYToUse1 = "2"
DisplayName = "50360"
DR2 = "true"
Durability = "60"
EffectOnImpact = "2"
EffectOnVictim = "21"
FatalHitReaction = "73"
FiringRate = "4"
Friction = "25"
HandlingStyle = "3"
HitReaction = "79"
HitReaction0 = "HITREACTION_WEAPON_MEDIUM"
IconFilename = "w_old6shooter"
IgnoreAnyComboRequests2 = "true"
Impulse = "1"
InteractDistance = "1.2"
InventoryInteractionType = "0"
Is_Cliche = "true"
Is_Humour = "false"
IsAutomatic = "true"
IsBurstGun = "true"
IsWeapon = "true"
LoadDistance = "25"
MaxBulletDistance = "40"
MaxBulletsPerClip = "6"
MaxBurstBulletCount = "6"
MergedFilename = "data/dynamicprops/handgun6shooter"
NumPelletsPerShot = "1"
PropEffectLocator0 = "15"
PropEffectsOnCondition0 = "7"
PropEffectsOnCondition1 = "9"
PyroEffect0 = "60"
PyroEffect1 = "153"
RequiresReload = "false"
ResetComboSeqCounter0 = "false"
ResetComboSeqCounter1 = "false"
ResetComboSeqCounter2 = "true"
Restitution = "0.05"
RestrictedByRegion = "false"
Reticle_AccuracyDecreasePerShot = "0.5"
Reticle_ActiveInRangeMode = "true"
Reticle_BestAccuracy = "0.95"
Reticle_MinMovementRateBeforeAccuracyDecrease = "0"
Reticle_ReturnToNormalAccuracyRate = "0.035"
Reticle_Type = "0"
Reticle_WorstAccuracy = "0.7"
Reward = "true"
ShowInCheatMenu = "true"
SkillRequired = "0"
SupportsRapidFire = "false"
SurvivorHandlingTwoHands = "false"
SurvivorWeapon = "true"
UniqueItem = "true"
UnlimitedDurability = "true"
VibrationPattern = "5"
VomitCoolDown = "4"
WeaponType = "5"
Weight = "6"
cLimbDestroyInfoItem Sixshooter_gore
{
Limb0 = "0"
Limb1 = "1"
Limb2 = "2"
Limb3 = "3"
Limb4 = "4"
ProbabilityOfExploding0 = "1"
ProbabilityOfExploding1 = ".75"
ProbabilityOfExploding2 = ".75"
ProbabilityOfExploding3 = ".25"
ProbabilityOfExploding4 = ".25"
}
cPrestigePointInfoItem SixShooter_prestige
{
PrestigePointsAwarded0 = "10"
PrestigePointsAwarded1 = "10"
RewardCondition0 = "14"
RewardCondition1 = "13"
}
}
cFirearmItem EnhancedShotgun1
{
AchievementCategory = "2"
ActionButton0 = "PLAYERBUTTON_WEAPON_ATTACK_RESERVED_FOR_SURVIVOR"
ActionDesiredAnimState0 = "ANIMSTATE_SIDLEAIMGUN"
ActionTargetCrawlerOnly6 = "false"
AimIKLeftAngleLimit = "50"
AimIKRightAngleLimit = "30"
AnimationChooserValueForEnhancedAnims = "1"
AnimationChooserValueForFirearms = "3"
AnimationChooserValueForHand = "11"
AnimationChooserValueForIdle = "1"
AnimationChooserValueForJump = "1"
AnimationChooserValueForPickup = "1"
AnimationChooserValueForPutdown = "4"
AnimationChooserValueForWalkRun = "1"
AssetFilename = "data/models/weapons/shotgun_pistolgrip"
AttachPropToBoneType = "0"
AudioActionBits = "256"
AudioFilename = "fx_shotgun"
AudioItemName = "Shotgun"
AudioUnloadDeferralTime = "3"
BaseBulletDamage = "20"
BenchRestRotation = "-0.5,-0.5,0.5,0.5"
CanBePlacedOnZombie = "false"
CollidableQuality = "0"
CollisionAudioDissipationFactor = "0.02"
CollisionType = "3"
DisplayName = "50210"
DR2 = "true"
DR2PRO = "true"
Durability = "20"
EffectOnImpact = "2"
EjectRagdollUpInTheAir = "true"
FatalHitReaction = "38"
FiringRate = "1.25"
Friction = "25"
HandlingStyle = "3"
HidesFranksCamera = "true"
HitReaction = "13"
HitReaction0 = "HITREACTION_WEAPON_MEDIUM"
IconFilename = "w_shotgun_handgrip"
Impulse = "450"
InteractDistance = "1.3"
InventoryInteractionType = "0"
Is_Cascading = "true"
Is_Humour = "false"
IsWeapon = "true"
LoadDistance = "25"
LocatorOrientationOffset = "0.000,0.000,0.000,1.000"
LocatorPositionOffset = "0.000,0.000,0.000"
MaxBulletDistance = "20"
MaxBulletsPerClip = "4"
MaxPelletSpread = "0.25"
NumPelletsPerShot = "12"
PropEffectLocator0 = "16"
PropEffectLocatorIndex0 = "0"
PropEffectsOnCondition0 = "7"
PropEffectsOnCondition1 = "9"
PropEffectsOnCondition2 = "12"
PyroEffect0 = "23"
PyroEffect1 = "43"
PyroEffect2 = "49"
RequiresReload = "false"
Restitution = "0.08"
RestrictedByRegion = "false"
Reticle_AccuracyDecreasePerShot = "0"
Reticle_ActiveInRangeMode = "true"
Reticle_ActiveInThirdPerson = "false"
Reticle_BestAccuracy = "1"
Reticle_MinMovementRateBeforeAccuracyDecrease = "0"
Reticle_ReturnToNormalAccuracyRate = "1"
Reticle_Type = "3"
Reticle_WorstAccuracy = "1"
ShowInCheatMenu = "true"
SkillRequired = "0"
SurvivorHandlingTwoHands = "true"
SurvivorWeapon = "true"
UnlimitedDurability = "true"
VertOffsetFromHandToMuzzle = "0.1"
VibrationPattern = "5"
VomitCoolDown = "4"
WeaponType = "15"
Weight = "15"
cLimbDestroyInfoItem shotgun_limbdestroyinfo
{
Limb0 = "0"
Limb1 = "1"
Limb2 = "2"
Limb3 = "4"
Limb4 = "3"
ProbabilityOfExploding0 = "0.3"
ProbabilityOfExploding1 = "0.3"
ProbabilityOfExploding2 = "0.3"
ProbabilityOfExploding3 = "0.3"
ProbabilityOfExploding4 = "0.3"
}
}
cFirearmItem EnhancedM2491
{
AchievementCategory = "2"
ActionButton0 = "PLAYERBUTTON_WEAPON_ATTACK_RESERVED_FOR_SURVIVOR"
ActionDesiredAnimState0 = "ANIMSTATE_SIDLEAIMGUN"
ActionTargetCrawlerOnly6 = "false"
AimIKLeftAngleLimit = "50"
AimIKRightAngleLimit = "30"
AnimationChooserValueForEnhancedAnims = "1"
AnimationChooserValueForFirearms = "0"
AnimationChooserValueForHand = "11"
AnimationChooserValueForIdle = "1"
AnimationChooserValueForJump = "1"
AnimationChooserValueForPickup = "1"
AnimationChooserValueForPutdown = "4"
AnimationChooserValueForWalkRun = "1"
AttachPropToBoneType = "0"
AudioActionBits = "256"
AudioFilename = "fx_m249"
AudioItemName = "M249"
AudioUnloadDeferralTime = "3"
BaseBulletDamage = "30"
BenchRestRotation = "0,0,0,1"
CanBePlacedOnZombie = "false"
CollidableQuality = "0"
CollisionAudioDissipationFactor = "0.2"
CollisionType = "3"
DisplayName = "50136"
DR2 = "true"
Durability = "200"
EffectOnImpact = "2"
EffectOnVictim = "20"
FatalHitReaction = "50"
FiringRate = "10"
Friction = "25"
HandlingStyle = "3"
HidesFranksCamera = "true"
HitReaction = "51"
HitReaction0 = "HITREACTION_WEAPON_MEDIUM"
IconFilename = "w_m249"
Impulse = "1"
InteractDistance = "1.3"
InventoryInteractionType = "0"
IsAutomatic = "true"
IsWeapon = "true"
LoadDistance = "25"
LocatorOrientationOffset = "0.000,0.000,0.000,1.000"
LocatorPositionOffset = "0.000,0.000,0.000"
MaxBulletDistance = "40"
MaxBulletsPerClip = "60"
MaxDamageDealtPerAttack = ""
NumPelletsPerShot = "1"
PoseAs = "MercAssaultRifle"
PropEffectLocator0 = "16"
PropEffectLocator2 = "16"
PropEffectLocatorIndex0 = "0"
PropEffectsOnCondition0 = "7"
PropEffectsOnCondition1 = "9"
PropEffectsOnCondition2 = "12"
PyroEffect0 = "89"
PyroEffect1 = "43"
PyroEffect2 = "65"
RequiresReload = "false"
Restitution = "0.08"
RestrictedByRegion = "false"
Reticle_AccuracyDecreasePerShot = "0.18"
Reticle_ActiveInRangeMode = "true"
Reticle_ActiveInThirdPerson = "false"
Reticle_BestAccuracy = "0.7"
Reticle_EnableAutoTargeting = "false"
Reticle_MinMovementRateBeforeAccuracyDecrease = "1"
Reticle_ReturnToNormalAccuracyRate = "0.05"
Reticle_Type = "0"
Reticle_WorstAccuracy = "0"
RotationOffset = "0.045"
ShowInCheatMenu = "true"
SkillRequired = "0"
SurvivorHandlingTwoHands = "true"
SurvivorWeapon = "true"
UniqueItem = "true"
UnlimitedDurability = "true"
VertOffsetFromHandToMuzzle = "0.145"
VibrationPattern = "10"
VomitCoolDown = "4"
WaveAmplitude = "0.05"
WaveSpeed = "2.5"
WeaponType = "15"
Weight = "20"
cLimbDestroyInfoItem LMG_M249_Limb_Removal
{
Limb0 = "0"
Limb1 = "1"
Limb2 = "2"
Limb3 = "3"
Limb4 = "4"
ProbabilityOfExploding0 = ".75"
ProbabilityOfExploding1 = ".5"
ProbabilityOfExploding2 = ".5"
ProbabilityOfExploding3 = ".2"
ProbabilityOfExploding4 = ".2"
}
}
cFirearmItem EnhancedM161
{
AchievementCategory = "2"
ActionButton0 = "PLAYERBUTTON_WEAPON_ATTACK_RESERVED_FOR_SURVIVOR"
ActionDesiredAnimState0 = "ANIMSTATE_SIDLEAIMGUN"
ActionTargetCrawlerOnly6 = "false"
AimIKLeftAngleLimit = "50"
AimIKRightAngleLimit = "30"
AnimationChooserValueForEnhancedAnims = "1"
AnimationChooserValueForFirearms = "0"
AnimationChooserValueForHand = "11"
AnimationChooserValueForIdle = "1"
AnimationChooserValueForJump = "1"
AnimationChooserValueForPickup = "1"
AnimationChooserValueForPutdown = "4"
AnimationChooserValueForWalkRun = "1"
AssetFilename = "data/models/weapons/m16"
AttachPropToBoneType = "0"
AttackAudioAssetName0 = "M16HitBody"
AudioActionBits = "256"
AudioFilename = "fx_m16"
AudioItemName = "M16"
AudioUnloadDeferralTime = "3"
BaseBulletDamage = "35"
BenchRestRotation = "0,0,0,1"
CanBePlacedOnZombie = "false"
CollidableQuality = "0"
CollisionAudioDissipationFactor = "0.01"
CollisionType = "3"
DisplayName = "50009"
DR2 = "true"
DR2PRO = "true"
Durability = "60"
EffectOnImpact = "2"
EffectOnVictim = "0"
FatalHitReaction = "50"
FiringRate = "12"
Friction = "25"
HandlingStyle = "3"
HidesFranksCamera = "true"
HitReaction = "3"
HitReaction0 = "HITREACTION_WEAPON_MEDIUM"
IconFilename = "w_m16"
Impulse = "1"
InteractDistance = "1.3"
InventoryInteractionType = "0"
IsAutomatic = "true"
IsBurstGun = "false"
IsWeapon = "true"
LoadDistance = "25"
LocatorOrientationOffset = "0.000,0.000,0.000,1.000"
LocatorPositionOffset = "0.000,0.000,0.000"
MaxBulletDistance = "50"
MaxBulletsPerClip = "60"
NumPelletsPerShot = "1"
PoseAs = "MercAssaultRifle"
PropEffectLocator0 = "16"
PropEffectLocator2 = "16"
PropEffectLocatorIndex0 = "0"
PropEffectsOnCondition0 = "7"
PropEffectsOnCondition1 = "9"
PropEffectsOnCondition2 = "12"
PyroEffect0 = "89"
PyroEffect1 = "153"
PyroEffect2 = "65"
RequiresReload = "false"
Restitution = "0.08"
RestrictedByRegion = "false"
Reticle_AccuracyDecreasePerShot = "0.175"
Reticle_ActiveInRangeMode = "true"
Reticle_ActiveInThirdPerson = "false"
Reticle_BestAccuracy = "0.85"
Reticle_MinMovementRateBeforeAccuracyDecrease = "0"
Reticle_ReturnToNormalAccuracyRate = "0.04"
Reticle_Type = "0"
Reticle_WorstAccuracy = "0.3"
ShowInCheatMenu = "true"
SkillRequired = "0"
SurvivorHandlingTwoHands = "true"
SurvivorWeapon = "true"
UnlimitedDurability = "true"
VertOffsetFromHandToMuzzle = "0.1"
VibrationPattern = "5"
VomitCoolDown = "4"
WeaponType = "15"
Weight = "15"
cLimbDestroyInfoItem AR_Gore1
{
Limb0 = "0"
Limb1 = "1"
Limb2 = "2"
mFlags0 = "0"
mFlags1 = "0"
mFlags2 = "0"
mFlags3 = "1024"
mFlags4 = "1024"
ProbabilityOfExploding0 = ".75"
ProbabilityOfExploding1 = ".05"
ProbabilityOfExploding2 = ".05"
}
}
cFirearmItem EnhancedBarrett50Caliber1
{
AchievementCategory = "2"
AimIKLeftAngleLimit = "50"
AimIKRightAngleLimit = "30"
AlternateWeaponViewCam = "24"
AnimationChooserValueForFirearms = "4"
AnimationChooserValueForHand = "11"
AnimationChooserValueForIdle = "1"
AnimationChooserValueForPickup = "1"
AnimationChooserValueForPutdown = "4"
AnimationChooserValueForThrow = "0"
AnimationChooserValueForWalkRun = "1"
AssetFilename = "barrett50caliber"
AudioActionBits = "256"
AudioFilename = "fx_barrett50caliber"
AudioItemName = "Barrett50Caliber"
BaseBulletDamage = "250"
CollidableQuality = "0"
CollisionAudioDissipationFactor = "0.2"
CollisionType = "3"
DisplayName = "50355"
DR2 = "true"
DR2PRO = "true"
Durability = "20"
EffectOnImpact = "281"
EffectOnVictim = "10"
EjectRagdollUpInTheAir = "false"
FatalHitReaction = "38"
FiringRate = "0.75"
Friction = "25"
HandlingStyle = "3"
HidesFranksCamera = "true"
HitReaction = "74"
IconFilename = "w_barrett50caliber"
Impulse = "550"
InteractDistance = "1.4"
InventoryInteractionType = "0"
Is_Cascading = "true"
IsAutomatic = "false"
IsWeapon = "true"
LoadDistance = "25"
MaxBulletDistance = "100"
MaxBulletsPerClip = "20"
MergedFilename = "data/dynamicprops/Barrett50Caliber"
NumPelletsPerShot = "1"
PropEffectLocator2 = "16"
PropEffectsOnCondition0 = "7"
PropEffectsOnCondition1 = "9"
PropEffectsOnCondition2 = "12"
PyroEffect0 = "254"
PyroEffect1 = "43"
PyroEffect2 = "152"
RequiresReload = "false"
RestrictedByRegion = "false"
Reticle_AccuracyDecreasePerShot = "0"
Reticle_ActiveInRangeMode = "true"
Reticle_ActiveInThirdPerson = "false"
Reticle_BestAccuracy = "1"
Reticle_MinMovementRateBeforeAccuracyDecrease = "0"
Reticle_ReturnToNormalAccuracyRate = "1"
Reticle_Type = "4"
Reticle_WorstAccuracy = "1"
Reward = "true"
RotationOffset = "0.045"
ShowInCheatMenu = "true"
SurvivorHandlingTwoHands = "true"
SurvivorWeapon = "true"
UnlimitedDurability = "true"
VibrationPattern = "10"
VomitCoolDown = "4"
WeaponType = "15"
Weight = "20"
ZombiePunchThroughCount = "10"
cLimbDestroyInfoItem SniperRifle_Gore
{
Limb0 = "0"
Limb1 = "2"
Limb2 = "1"
Limb3 = "2"
Limb4 = "3"
ProbabilityOfExploding0 = "1"
ProbabilityOfExploding1 = "1"
ProbabilityOfExploding2 = "1"
ProbabilityOfExploding3 = "1"
ProbabilityOfExploding4 = "1"
}
}
cFirearmItem EnhancedMercAssaultRifle1
{
AchievementCategory = "2"
ActionButton0 = "PLAYERBUTTON_WEAPON_ATTACK_RESERVED_FOR_SURVIVOR"
ActionDesiredAnimState0 = "ANIMSTATE_SIDLEAIMGUN"
AimIKLeftAngleLimit = "50"
AimIKRightAngleLimit = "30"
AnimationChooserValueForFirearms = "0"
AnimationChooserValueForHand = "11"
AnimationChooserValueForIdle = "1"
AnimationChooserValueForPickup = "1"
AnimationChooserValueForPutdown = "4"
AnimationChooserValueForWalkRun = "1"
AssetFilename = "data/models/weapons/merc_ar"
AttachPropToBoneType = "0"
AudioActionBits = "256"
AudioCollisionProfile = "0"
AudioFilename = "fx_mercenaryassaultrifle"
AudioItemName = "MercAssaultRifle"
BaseBulletDamage = "35"
BenchRestRotation = "-0.600,0.600,-0.372,0.372"
CollidableQuality = "0"
CollisionAudioDissipationFactor = "0.01"
CollisionBits = "WORLDCOLLISIONFILTER_DYNAMIC_PROP"
CollisionType = "3"
DisplayName = "50472"
DR2 = "true"
Durability = "45"
EffectOnImpact = "2"
EffectOnVictim = "0"
FatalHitReaction = "73"
FiringRate = "12"
Friction = "25"
HandlingStyle = "3"
HidesFranksCamera = "true"
HitReaction = "51"
HitReaction0 = "HITREACTION_WEAPON_MEDIUM"
IconFilename = "w_akfortyseven"
Impulse = "1"
InteractDistance = "1.3"
InventoryInteractionType = "0"
IsAutomatic = "true"
IsWeapon = "true"
LoadDistance = "25"
MaxBulletDistance = "40"
MaxBulletsPerClip = "45"
MaxDamageDealtPerAttack = "25"
NumPelletsPerShot = "1"
PropEffectLocator0 = "16"
PropEffectLocator2 = "16"
PropEffectLocatorIndex0 = "0"
PropEffectsOnCondition0 = "7"
PropEffectsOnCondition1 = "9"
PropEffectsOnCondition2 = "12"
PyroEffect0 = "89"
PyroEffect1 = "43"
PyroEffect2 = "65"
RequiresReload = "false"
Restitution = "0.08"
RestrictedByRegion = "false"
Reticle_AccuracyDecreasePerShot = "0.225"
Reticle_ActiveInRangeMode = "true"
Reticle_BestAccuracy = "0.825"
Reticle_MinMovementRateBeforeAccuracyDecrease = "1"
Reticle_ReturnToNormalAccuracyRate = "0.0525"
Reticle_Type = "0"
Reticle_WorstAccuracy = "0.1"
Reward = "true"
ShowInCheatMenu = "true"
SurvivorHandlingTwoHands = "true"
SurvivorWeapon = "true"
VertOffsetFromHandToMuzzle = "0.07"
VibrationPattern = "10"
VomitCoolDown = "4"
UnlimitedDurability = "true
WeaponType = "15"
Weight = "15"
cLimbDestroyInfoItem Merc_gore
{
Limb0 = "0"
Limb1 = "1"
Limb2 = "2"
ProbabilityOfExploding0 = ".85"
ProbabilityOfExploding1 = ".35"
ProbabilityOfExploding2 = ".35"
}
cExternalLocatorItem HoldMAR
{
ID = "0"
ParentBone = "-1"
Position = "0.000,-0.110,-0.140"
Rotation = "-0.710,0.160,0.028,0.691"
Type = "9"
}
}
cFirearmItem EnhancedHandGun1
{
AchievementCategory = "2"
ActionButton0 = "PLAYERBUTTON_WEAPON_ATTACK_RESERVED_FOR_SURVIVOR"
ActionDesiredAnimState0 = "ANIMSTATE_SIDLEAIMGUN"
AimIKLeftAngleLimit = "38"
AimIKRightAngleLimit = "45"
AnimationChooserValueForFirearms = "2"
AnimationChooserValueForHand = "11"
AnimationChooserValueForIdle = "0"
AnimationChooserValueForPickup = "0"
AnimationChooserValueForPutdown = "0"
AnimationChooserValueForWalkRun = "0"
AssetFilename = "data/models/weapons/handgun"
AttachPropToBoneType = "0"
AudioActionBits = "256"
AudioFilename = "fx_handgun"
AudioItemName = "HandGun"
BaseBulletDamage = "30"
BenchRestRotation = "0,0,0,1"
CollidableQuality = "0"
CollisionAudioDissipationFactor = "0.01"
CollisionType = "3"
DisplayName = "50311"
DR2 = "true"
DR2PRO = "true"
Durability = "30"
EffectOnImpact = "2"
EffectOnVictim = "0"
FatalHitReaction = "5"
FiringRate = "3.5"
Friction = "25"
HandlingStyle = "3"
HitReaction = "51"
HitReaction0 = "HITREACTION_WEAPON_MEDIUM"
IconFilename = "w_handgun"
Impulse = "1"
InteractDistance = "1.2"
InventoryInteractionType = "0"
IsWeapon = "true"
LoadDistance = "20"
MaxBulletDistance = "40"
MaxBulletsPerClip = "6"
NumPelletsPerShot = "1"
PropEffectLocator0 = "16"
PropEffectLocatorIndex0 = "0"
PropEffectsOnCondition0 = "7"
PropEffectsOnCondition1 = "9"
PropEffectsOnCondition2 = "12"
PyroEffect0 = "60"
PyroEffect1 = "43"
PyroEffect2 = "65"
RequiresReload = "false"
Restitution = "0.2"
Reticle_AccuracyDecreasePerShot = "0.6"
Reticle_ActiveInRangeMode = "true"
Reticle_BestAccuracy = "0.915"
Reticle_MinMovementRateBeforeAccuracyDecrease = "0"
Reticle_ReturnToNormalAccuracyRate = "0.035"
Reticle_Type = "0"
Reticle_WorstAccuracy = "0.6"
ShowInCheatMenu = "true"
SkillRequired = "0"
SurvivorHandlingTwoHands = "false"
SurvivorWeapon = "true"
UnlimitedDurability = "true"
VertOffsetFromHandToMuzzle = "0.155"
VibrationPattern = "5"
VomitCoolDown = "4"
WeaponType = "5"
Weight = "6"
cLimbDestroyInfoItem Handgun_gore
{
Limb0 = "0"
ProbabilityOfExploding0 = ".075"
}
cExternalLocatorItem LeftHandHandGun
{
ID = "0"
ParentBone = "-1"
Position = "0.009,-0.080,0.000"
Rotation = "0,0,0,1"
Type = "27"
}
}
cFirearmItem EnhancedSubGun1
{
AchievementCategory = "2"
ActionButton0 = "PLAYERBUTTON_WEAPON_ATTACK_RESERVED_FOR_SURVIVOR"
ActionDesiredAnimState0 = "ANIMSTATE_SIDLEAIMGUN"
AimIKLeftAngleLimit = "38"
AimIKRightAngleLimit = "45"
AnimationChooserValueForFirearms = "2"
AnimationChooserValueForHand = "11"
AnimationChooserValueForIdle = "0"
AnimationChooserValueForPickup = "0"
AnimationChooserValueForPutdown = "0"
AnimationChooserValueForWalkRun = "0"
AssetFilename = "subgun"
AttachPropToBoneType = "0"
AudioActionBits = "256"
AudioCollisionProfile = "0"
AudioFilename = "fx_mercenaryassaultrifle"
AudioItemName = "MercAssaultRifle"
BaseBulletDamage = "40"
CollidableQuality = "0"
CollisionAudioDissipationFactor = "0.01"
CollisionBits = "WORLDCOLLISIONFILTER_DYNAMIC_PROP"
CollisionType = "3"
DisplayName = "02233"
DR2 = "true"
Durability = "100"
EffectOnImpact = "2"
EffectOnVictim = "0"
FatalHitReaction = "5"
FiringRate = "12"
Friction = "25"
HandlingStyle = "0"
HitReaction = "51"
HitReaction0 = "HITREACTION_WEAPON_MEDIUM"
IconFilename = "w_handgun"
Impulse = "1"
InteractDistance = "1.2"
InventoryInteractionType = "0"
IsAutomatic = "true"
IsWeapon = "true"
LoadDistance = "25"
MaxBulletDistance = "40"
MaxBulletsPerClip = "100"
NumPelletsPerShot = "1"
PropEffectLocator0 = "16"
PropEffectLocator2 = "16"
PropEffectLocatorIndex0 = "0"
PropEffectsOnCondition0 = "7"
PropEffectsOnCondition1 = "9"
PropEffectsOnCondition2 = "12"
PyroEffect0 = "60"
PyroEffect1 = "43"
PyroEffect2 = "65"
RequiresReload = "false"
Restitution = "0.08"
RestrictedByRegion = "false"
Restitution = "0.2"
Reticle_AccuracyDecreasePerShot = "0.6"
Reticle_ActiveInRangeMode = "true"
Reticle_BestAccuracy = "0.915"
Reticle_MinMovementRateBeforeAccuracyDecrease = "0"
Reticle_ReturnToNormalAccuracyRate = "0.035"
Reticle_Type = "0"
Reticle_WorstAccuracy = "0.47"
Reward = "true"
SurvivorHandlingTwoHands = "false"
SurvivorWeapon = "true"
UnlimitedDurability = "true"
VertOffsetFromHandToMuzzle = "0.2"
VibrationPattern = "5"
WeaponType = "15"
Weight = "10"
RightWristBend = "0,-0.14,0"
cLimbDestroyInfoItem subgun_gore
{
Limb0 = "0"
ProbabilityOfExploding0 = ".075"
}
cExternalLocatorItem lefthandsubgun
{
ID = "0"
ParentBone = "-1"
Position = "0.009,-0.080,0.000"
Rotation = "0,0,0,1"
Type = "27"
}
}
cFirearmItem EnhancedMercArmyM161
{
AchievementCategory = "2"
ActionButton0 = "PLAYERBUTTON_WEAPON_ATTACK_RESERVED_FOR_SURVIVOR"
ActionDesiredAnimState0 = "ANIMSTATE_SIDLEAIMGUN"
AimIKLeftAngleLimit = "50"
AimIKRightAngleLimit = "30"
AnimationChooserValueForFirearms = "0"
AnimationChooserValueForHand = "11"
AnimationChooserValueForIdle = "1"
AnimationChooserValueForPickup = "1"
AnimationChooserValueForPutdown = "4"
AnimationChooserValueForWalkRun = "1"
AssetFilename = "data/models/weapons/m16light"
AttachPropToBoneType = "0"
AudioActionBits = "256"
AudioCollisionProfile = "0"
AudioFilename = "fx_mercenaryassaultrifle"
AudioItemName = "MercAssaultRifle"
BaseBulletDamage = "35"
CollidableQuality = "0"
CollisionAudioDissipationFactor = "0.01"
CollisionBits = "WORLDCOLLISIONFILTER_DYNAMIC_PROP"
CollisionType = "3"
DisplayName = "50009"
DR2 = "true"
Durability = "60"
EffectOnImpact = "2"
EffectOnVictim = "0"
FatalHitReaction = "51"
FiringRate = "12"
Friction = "25"
HandlingStyle = "3"
HidesFranksCamera = "true"
HitReaction = "52"
HitReaction0 = "HITREACTION_WEAPON_MEDIUM"
IconFilename = "w_m16"
Impulse = "1"
InteractDistance = "1.3"
InventoryInteractionType = "0"
IsAutomatic = "true"
IsWeapon = "true"
LoadDistance = "25"
MaxBulletDistance = "40"
MaxBulletsPerClip = "60"
MergedFilename = "data/dynamicprops/M16light"
NumPelletsPerShot = "1"
PropEffectLocator0 = "16"
PropEffectLocator2 = "18"
PropEffectLocatorIndex0 = "0"
PropEffectLocatorIndex2 = "0"
PropEffectsOnCondition0 = "7"
PropEffectsOnCondition1 = "9"
PropEffectsOnCondition2 = "0"
PyroEffect0 = "89"
PyroEffect1 = "153"
PyroEffect2 = "186"
RequiresReload = "false"
Restitution = "0.08"
RestrictedByRegion = "false"
Reticle_AccuracyDecreasePerShot = "0.175"
Reticle_ActiveInRangeMode = "true"
Reticle_ActiveInThirdPerson = "false"
Reticle_BestAccuracy = "0.85"
Reticle_MinMovementRateBeforeAccuracyDecrease = "0"
Reticle_ReturnToNormalAccuracyRate = "0.04"
Reticle_Type = "0"
Reticle_WorstAccuracy = "0.3"
Reward = "false"
SurvivorHandlingTwoHands = "false"
SurvivorWeapon = "true"
UnlimitedDurability = "true"
VertOffsetFromHandToMuzzle = "0.07"
VibrationPattern = "10"
WeaponType = "15"
Weight = "15"
cLimbDestroyInfoItem AR_Gore
{
Limb0 = "0"
Limb1 = "1"
Limb2 = "2"
mFlags0 = "0"
mFlags1 = "0"
mFlags2 = "0"
mFlags3 = "1024"
mFlags4 = "1024"
ProbabilityOfExploding0 = ".75"
ProbabilityOfExploding1 = ".2"
ProbabilityOfExploding2 = ".2"
}
}
cThemeItem Backpack
{
ClothingPartName = "backpack"
ImmuneToGettingSick = "false"
NoAccuracyLostForGuns = "true"
OutfitName = "OUTFIT_BACKPACK"
OutfitId = "OUTFIT_BACKPACK"
RequiredPartsCount = "1"
cEnhancedThemedItem eSixShooter
{
EnhancedItemName = "EnhancedSixShooter1"
ItemName = "SixShooter"
}
cEnhancedThemedItem eShotgun
{
EnhancedItemName = "EnhancedShotgun1"
ItemName = "Shotgun"
}
cEnhancedThemedItem eM249
{
EnhancedItemName = "EnhancedM2491"
ItemName = "M249"
}
cEnhancedThemedItem eM16
{
EnhancedItemName = "EnhancedM161"
ItemName = "M16"
}
cEnhancedThemedItem eBarrett50Caliber
{
EnhancedItemName = "EnhancedBarrett50Caliber1"
ItemName = "Barrett50Caliber"
}
cEnhancedThemedItem eMercAssaultRifle
{
EnhancedItemName = "EnhancedMercAssaultRifle1"
ItemName = "MercAssaultRifle"
}
cEnhancedThemedItem eHandGun
{
EnhancedItemName = "EnhancedHandGun1"
ItemName = "HandGun"
}
cEnhancedThemedItem eSubGun
{
EnhancedItemName = "EnhancedSubGun1"
ItemName = "SubGun"
}
cEnhancedThemedItem eMercArmyM16
{
EnhancedItemName = "EnhancedMercArmyM161"
ItemName = "MercArmyM16"
}
}
cClothingDispenserItem BackpackDispenser
{
AchievementCategory = "8"
AssetFilename = "data/models/interactables/clothesbox"
ClothingEmote = "1"
CollidableQuality = "0"
CollisionType = "3"
DisplayName = "00004"
DR2 = "true"
InteractDistance = "2"
IsFacewear = "true"
LoadDistance = "25"
MergedFilename = "data/dynamicprops/clothesbox"
OutfitName = "OUTFIT_BACKPACK"
OutfitId = "OUTFIT_BACKPACK"
OutfitIdFrank = "OUTFIT_BACKPACK"
Restitution = "0.05"
Unmoveable = "true"
Weight = "100"
}
cOutfitItem OUTFIT_BACKPACK
{
BodyItem = "NONE"
FacewearItem = "facewear_backpack"
FeetOverItem = "NONE"
FeetUnderItem = "NONE"
HeadwearItem = "NONE"
}
cFacewearItem facewear_backpack
{
FacewearAssetFilename = "facewear_backpack"
HeadAssetFilename = "head_naked"
}
Then copy the code below into safehouse.txt and the backpack will appear in the shower in the Safehouse: cItemPlacement BackpackDispenser
{
ItemName = "BackpackDispenser"
Location = "8.300,-1.067,25.320"
PropState = "-2"
Rotation = "-0.000,0.002,0.000,1.000"
}
For those wondering why I copied the code for the enhanced guns, it's so this mod doesn't conflict with the solider outfit. Enjoy |
|
billsy
Survivor
Keep living your life, with Zombrex
Posts: 66
|
Post by billsy on Jan 26, 2012 9:35:19 GMT -5
8 survivor rule. but great idea. Does this apply to the aggressive survivors in Sandbox Mode? If so, is there any way around this? Haven't actually started work on this yet, just finalizing the concept and things to implement. Update: The 8 survivor rule does not apply in Sandbox Mode. |
|